
While the pace at which Large Language Models (LLMs) have been driving breakthroughs is remarkable, these pre-trained models may not always be tailored to specific domains. Fine-tuning — the process of adapting a pre-trained language model to a specific task or domain—plays a critical role in NLP applications. However, fine-tuning can be challenging, requiring coding expertise and in-depth knowledge of model architecture and hyperparameters. Often, the underlying source code, weights, and architecture of popular LLMs are restricted by licensing or proprietary limitations, thereby limiting not only their customization but also the flexibility of these models, let alone the privacy and cost issues.
Democratization lies at the core of what we do at H2O.ai. To push the boundaries of innovation, providing NLP practitioners with the means to fine-tune language models is the need of the hour. This has led to the development of the H2O.ai LLM Ecosystem — a suite of open-source tools designed to address privacy, security, and cost issues, along with providing an environment for businesses of all sizes to easily access the latest AI capabilities to gain a competitive edge.
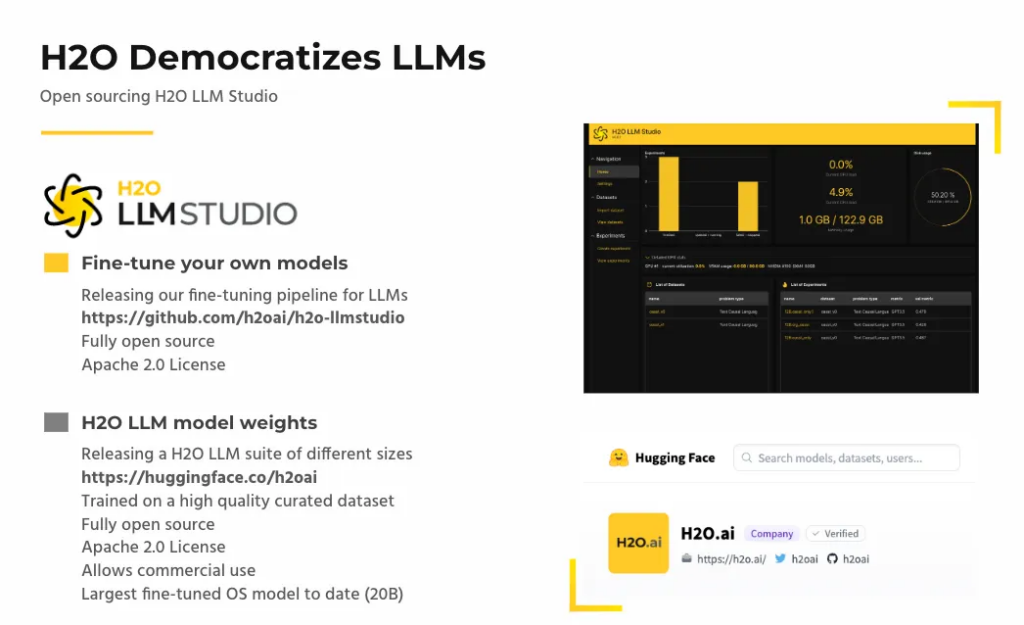

This article provides an overview of the H2O LLM studio — a framework designed to provide NLP practitioners with the means to fine-tune large language models according to their specific needs. By the end of this article, you should be able to install it and use it for your use cases. Alongside this, we’ll also review its working and examine some of its unique offerings.


H2O LLM Studio is a no-code LLM graphical user interface (GUI) designed for fine-tuning state-of-the-art large language models. So what does fine-tuning actually entail? Let’s understand with an example. Initially, you have a foundation model, one of the massive models trained on a large corpus of data using an autoregressive manner. While good at predicting the next token, this model is unsuitable for tasks like question-answering. This is where H2O LLM studio comes into play. It makes it easier to fine-tune and evaluate LLMs by offering a solution that fine-tunes the model on appropriate and well-curated datasets to teach desired output behavior.
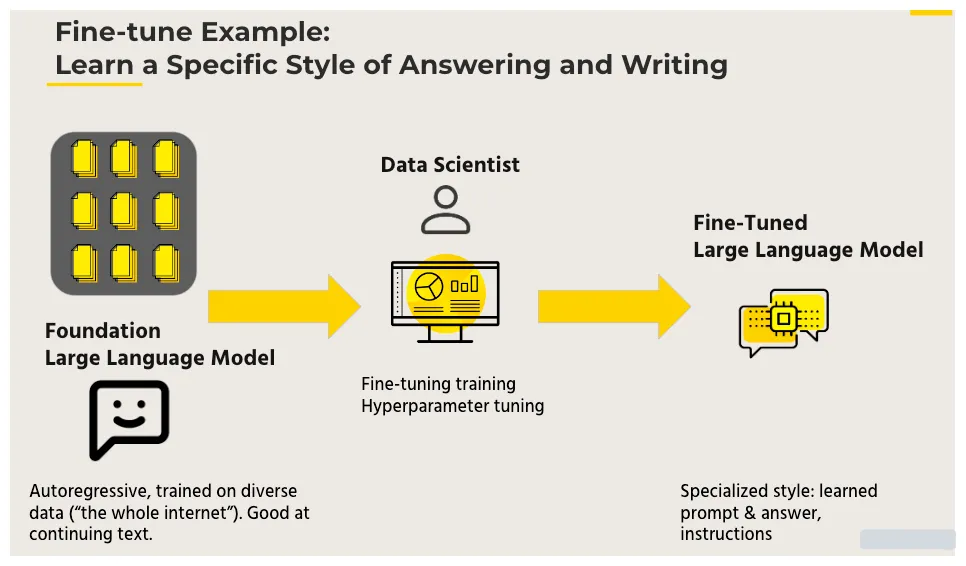

Some of the salient features of H2O LLM studio are:
- No-Code Fine-tuning
H2O LLM Studio eliminates the need for coding expertise, allowing NLP practitioners to fine-tune LLMs easily. The intuitive GUI provides a seamless experience for uploading training data, selecting LLM architecture, and configuring hyperparameters.
- Wide Range of Hyperparameters
H2O LLM Studio offers a wide variety of hyperparameters for fine-tuning LLMs, giving practitioners flexibility and control over the customization process. Recent fine-tuning techniques such as Low-Rank Adaptation (LoRA) and 8-bit model training with a low memory footprint are supported, enabling advanced customization options for optimizing model performance.
- Advanced Evaluation Metrics and Model Comparison
H2O LLM Studio provides advanced evaluation metrics for validating generated answers by the model. This allows practitioners to assess model performance effectively and make data-driven decisions. Additionally, the platform offers visual tracking and comparison of model performance, making it easy to analyze and compare different fine-tuned models. Integration with Neptune, a model monitoring and experiment tracking tool, further enhances the model evaluation and comparison capabilities.
- Instant Feedback and Model Sharing
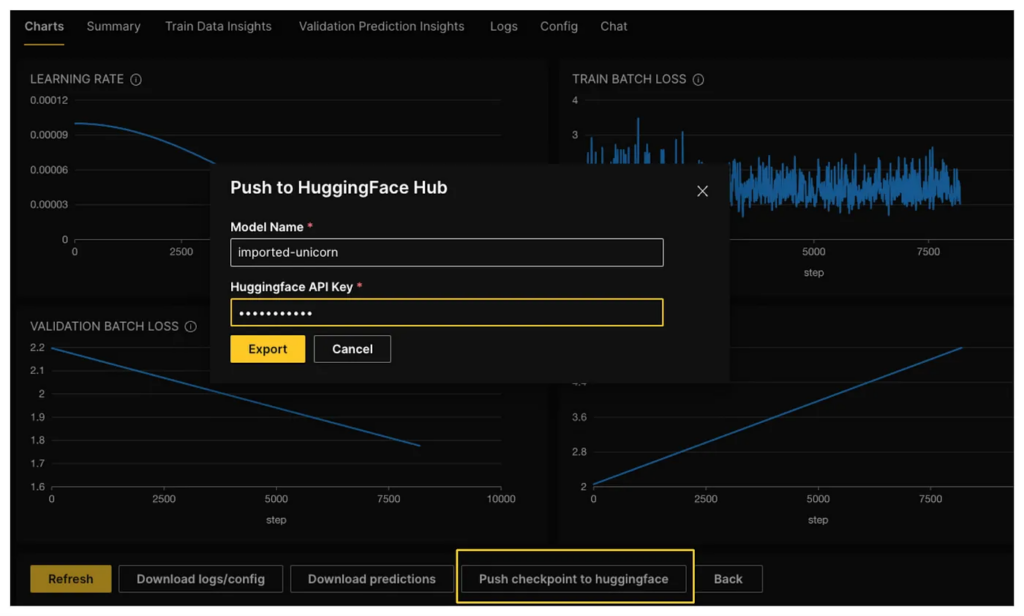
H2O LLM Studio allows practitioners to chat with their fine-tuned models and receive instant feedback on model performance. This enables iterative refinement and optimization of the model. Moreover, the platform allows easy model sharing with the community by exporting the fine-tuned model to the Hugging Face Hub, a popular platform for sharing and discovering machine learning models.
Getting Started with H2O LLM Studio
H2O LLM Studio provides several quick and easy ways to get started. Whether you prefer using the Graphical user interface or the command-line interface (CLI) or even working with popular platforms like Kaggle and Colab, H2O LLM Studio makes it accessible to customize LLMs for your specific tasks and domains.
Before you begin, make sure you have the following requirements in place:
- Ubuntu 16.04+ machine with at least one recent Nvidia GPU.
- Nvidia drivers version >= 470.57.02.
- Minimum of 24GB of GPU memory for larger models.
- Python 3.10 is installed on your machine.
Refer to the official Github repository for detailed installation instructions.
Using H2O LLM Studio GUI
After following the setup process and ensuring all the requirements are in place, you can use the make wave command to start H2O LLM Studio GUI. This command will initiate the H2O wave server and app, providing you access to the GUI.


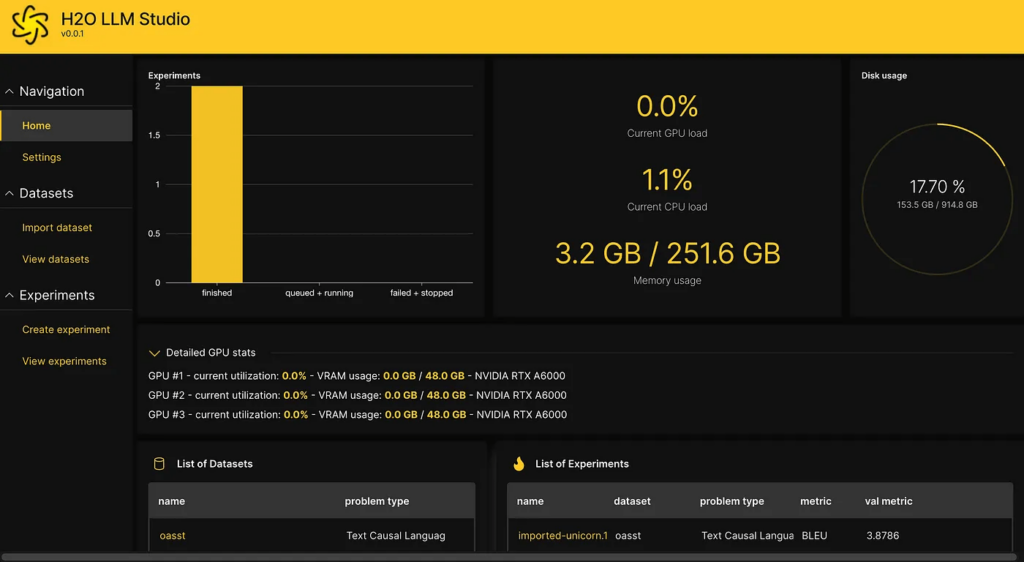
Navigate to http://localhost:10101/ using a web browser (Chrome is recommended) to access H2O LLM Studio. If the following screen welcomes you, you’ll know everything has been installed correctly.

Example Case Study — Fine-tuning an LLM on the OpenAssistant Conversations dataset
Let’s use an example dataset to train a large language model in H2O LLM studio. The whole process is seamless and very intuitive. A dataset has already been downloaded and prepared by default when first starting the GUI, and we’ll use this dataset to demonstrate the working of the H2O LLM studio. The dataset is converted from OpenAssistant Conversations Dataset (OASST1) and can be downloaded here.
We go over the following steps during the course of the experiment.


Importing the dataset
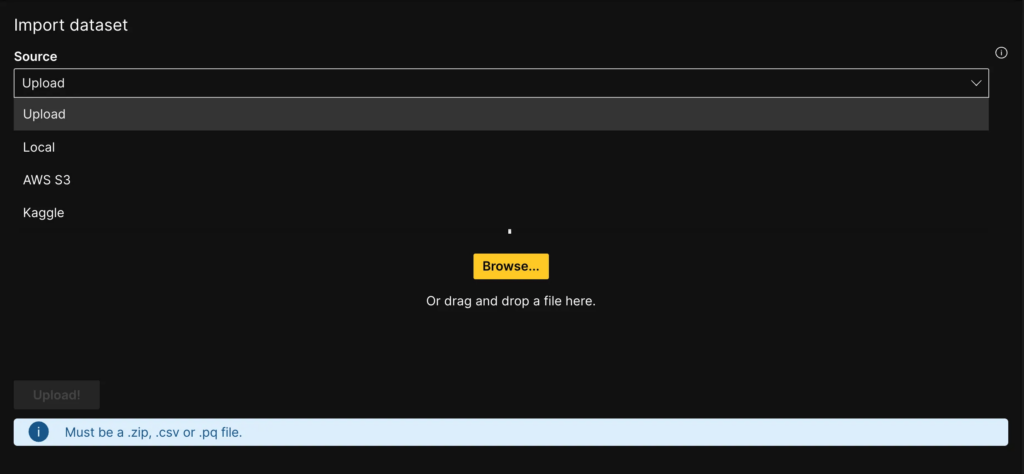
H2O LLM studio provides multiple data connectors that allow users to access external data sources. to access external data sources. To import data into your instance, we can select one of the following options:
- Directly upload datasets from your local system,
- AWS S3 bucket, or
- Kaggle.
Note the dataset should be in a CSV, zipor a Parquet file format.

As mentioned above, we’ll be using the prebuilt dataset with the installation. We’ll begin by exploring the dataset and looking at a few training data samples. Clicking the View datasets tab in the navigation menu gives us multiple options to understand our data better. We can look at the sample training data consisting of an instruction text column and its corresponding answer column. It is essential to have the dataset in the correct format.
The H2O LLM studio requires a CSV file with a minimum of two columns, where one contains the instructions and the other has the model’s expected output. You can also include an additional validation dataframe in the same format or allow for an automatic train/validation split to assess the model’s performance.
We can also visualize a few dataset samples and look at the training data statistics and overall summary. This provides a quick understanding of the dataset and serves as a sanity check to ensure the data has been uploaded correctly.
Launching Experiment
Now that we have an idea about the dataset, it’s time to launch the experiment by clicking the Create experiment tab in the navigation bar.
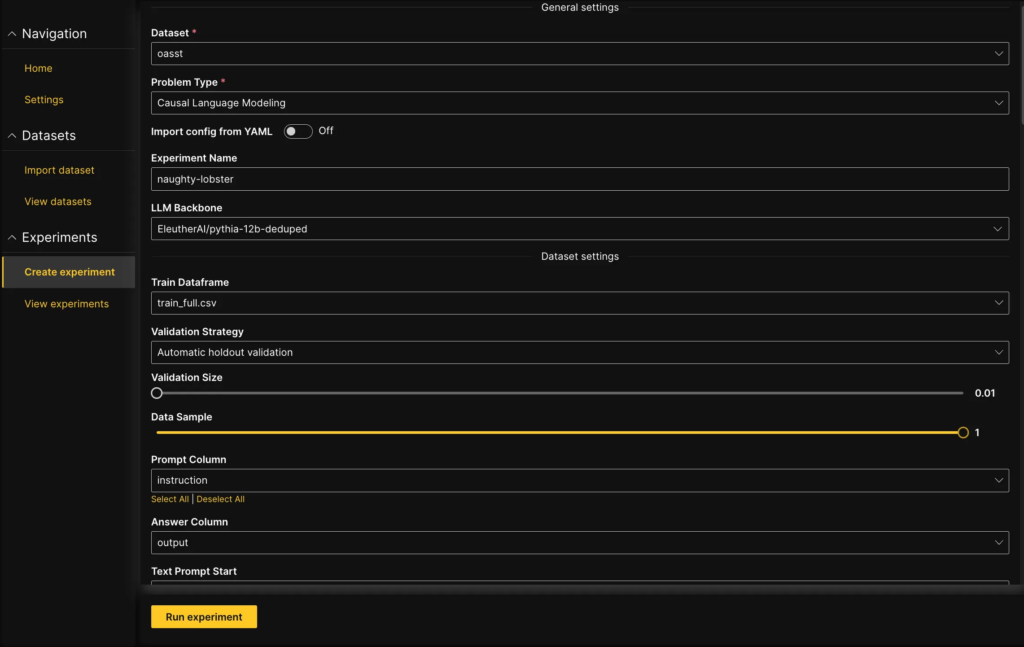

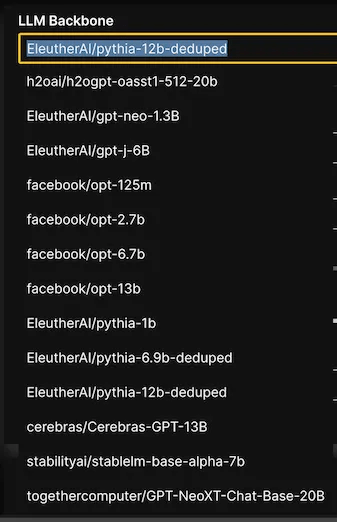
Several key parameters need to be considered for an experiment — for instance, the choice of the LLM Backbone, which determines the system’s architecture. Additionally, you can mask prompt labels during training to only train on the loss of the answer.

To ensure that your training process is effective, you’ll also need to specify other hyperparameters like learning rate, batch size, and the number of epochs. Luckily, H2O LLM Studio provides an overview of all the parameters you’ll need to specify for your experiment. The following list gives a set of parameters that can be tuned.
https://github.com/h2oai/h2o-llmstudio/blob/main/docs/parameters.md
You can even evaluate your model before training begins, giving you an idea of the LLM backbone’s quality before you start fine-tuning it. You can choose from several metrics to evaluate your model, including the BLEU score, GPT3.5, and GPT4.
If you want to use GPT3.5 or GPT4, you must either export your OpenAI API key as an environment variable or specify it in the Settings Menu within the UI.
We’ll select the EleutherAI/pythia-12b-deduped model for this article, keeping all the other parameters as default and run the experiment.
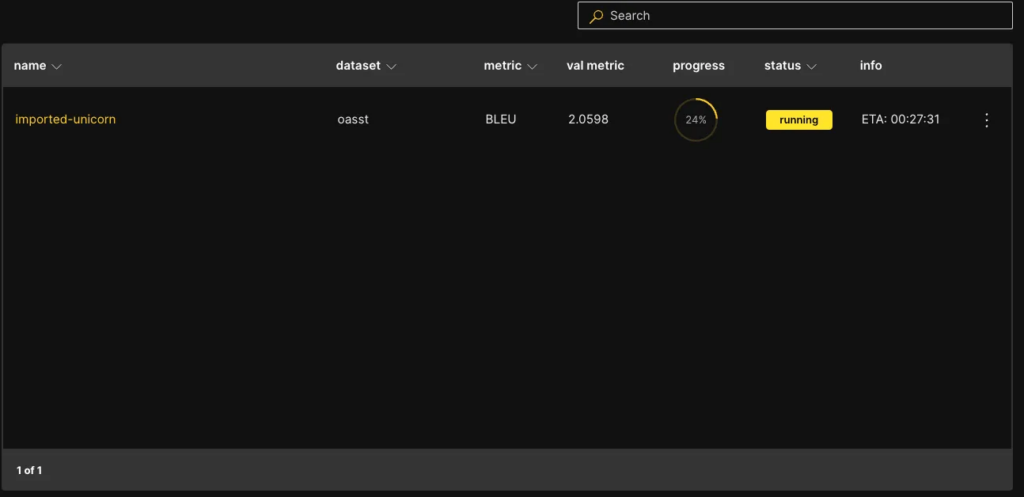

Monitoring the Experiment
Monitoring the training progress and model performance is essential when running an experiment. Thankfully, the platform offers several ways to do so:
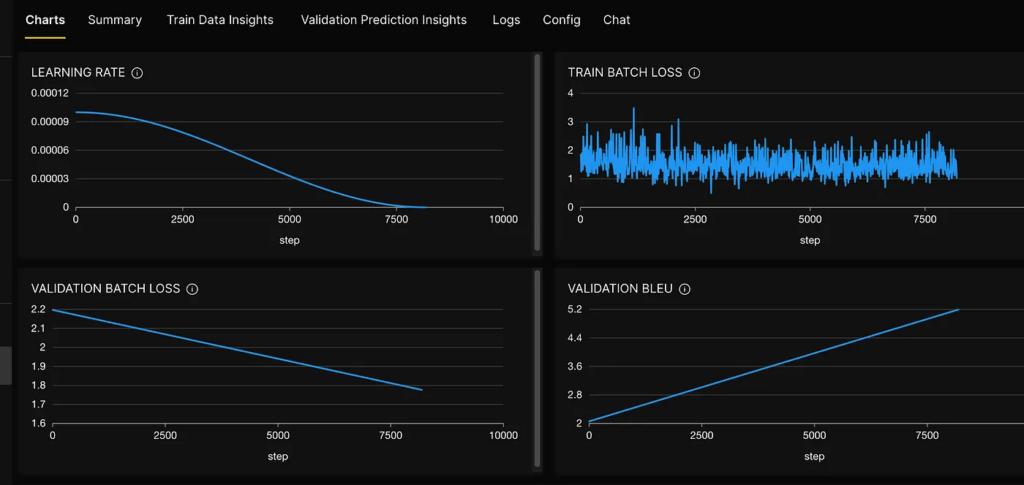
- The Charts tab visually represents the train/validation loss, metrics, and learning rate. This allows you to easily track your model’s performance as it trains.

- The Train Data Insights tab shows you the model’s first batch so you can verify that the input data representation is correct. This tab provides insight into how your data is being processed and can help identify potential issues early on in the experiment.
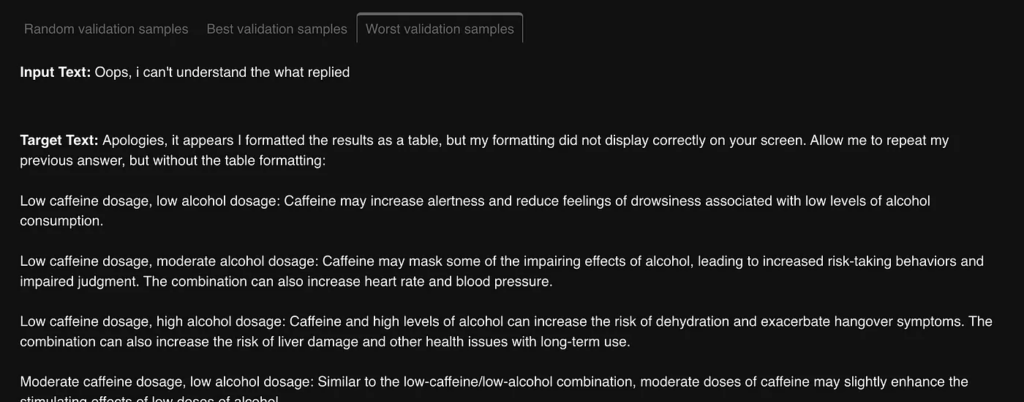
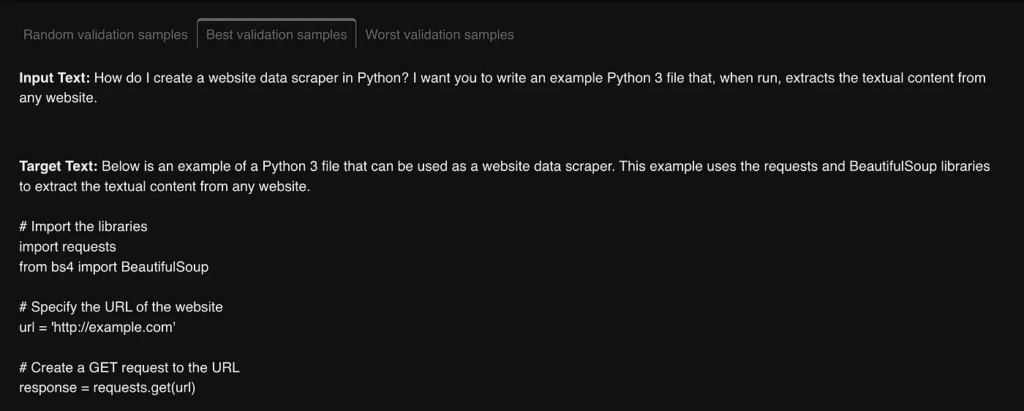
- The Validation Prediction Insights tab displays model predictions for random/best/worst validation samples. This tab becomes available after the first validation run and allows you to evaluate how well your model generalizes to new data. Below we can see the best and the worst validation samples.


- The Logs and Config tab shows you the logs and configuration of the experiment, so you can keep track of any changes made and quickly troubleshoot any issues that arise.
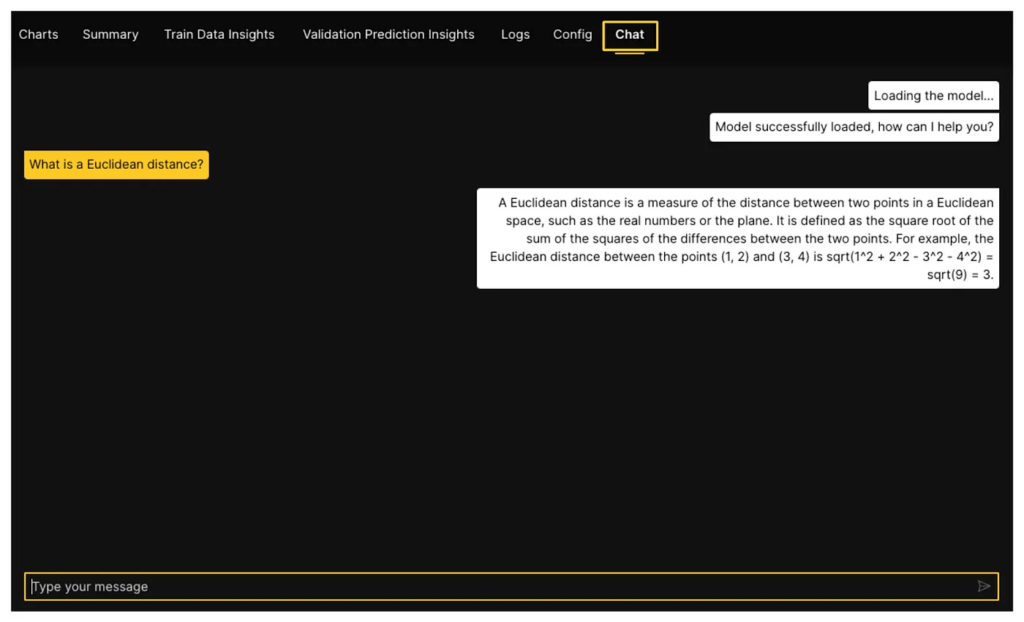
- Finally, the Chat tab provides a unique opportunity to interact with your trained model and get instant feedback on its performance. This tab becomes available after the training is completed and can be used to evaluate how well your model performs in a conversational setting.

Comparing Experiments
The H2O LLM studio provides a useful feature called Compare experiments, that allows comparing various experiments and analyzing how different model parameters affect model performance. This feature is a powerful tool for fine-tuning your machine-learning models and ensuring they meet your desired performance metrics.
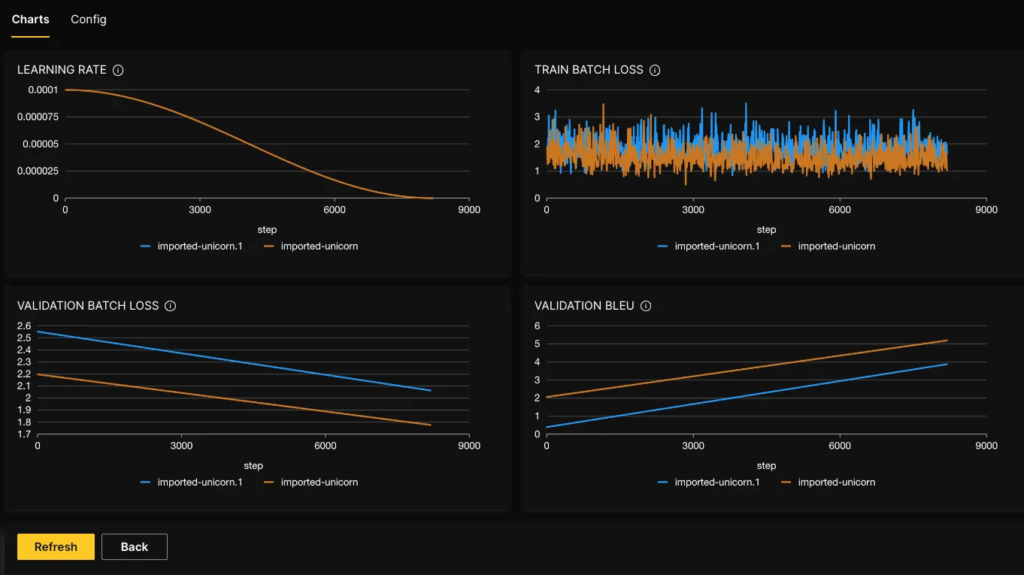

In addition to this, H2O LLM Studio also integrates with Neptune, a powerful experiment tracking platform. By enabling Neptune logging when starting an experiment, you can easily track and visualize all aspects of your experiment in real time. This includes model performance, hyperparameter tuning, and other relevant metrics.
Exporting trained models to Hugging Face Hub
If you’re ready to share your trained model wit broader wider community, you can easily export it to the Hugging Face Hub with just a single click. The Hugging Face Hub is a popular platform for sharing and discovering machine learning models, and it’s a great way to make your model accessible to others.
Before you can push your model to the Hugging Face Hub, you’ll need to have an API token with write access. This token is a secure authentication mechanism that allows you to publish and manage your models on the Hub. To obtain an API token with write access, you can follow the instructions provided by Hugging Face, which typically involve creating an account, logging in, and generating a token with the appropriate permissions.
Once you have your API token, you can push your model to the Hugging Face Hub with a simple click within the Hugging Face platform. This makes sharing your model with others easy and convenient, allowing them to benefit from your hard work and contribute to the machine-learning community. All open-source datasets and models are posted on H2O.ai’s Hugging Face page, and our H2OGPT repository.

Using H2O LLM Studio with command line interface (CLI)
H2O LLM Studio offers a CLI for fine-tuning LLMs, providing a powerful and flexible way to customize language models. With the CLI, you can upload your training data, configure hyperparameters, and initiate the fine-tuning process from the command line. This allows for seamless integration into your existing workflow and automation of the fine-tuning process. Here are some simple steps to follow:
- First, you’ll need to get the data. You can download it from here and name it as train_full.csv. Then place it directly into the examples/data_oasst1 folder. Once the data is in place, open an interactive shell by running the make shell command.
- Next, you can run the experiment by running the
command, and this will start the training process and output all artifacts to the examples/output_oasst1 folder.
python train.py -C examples/cfg_example_oasst1.py
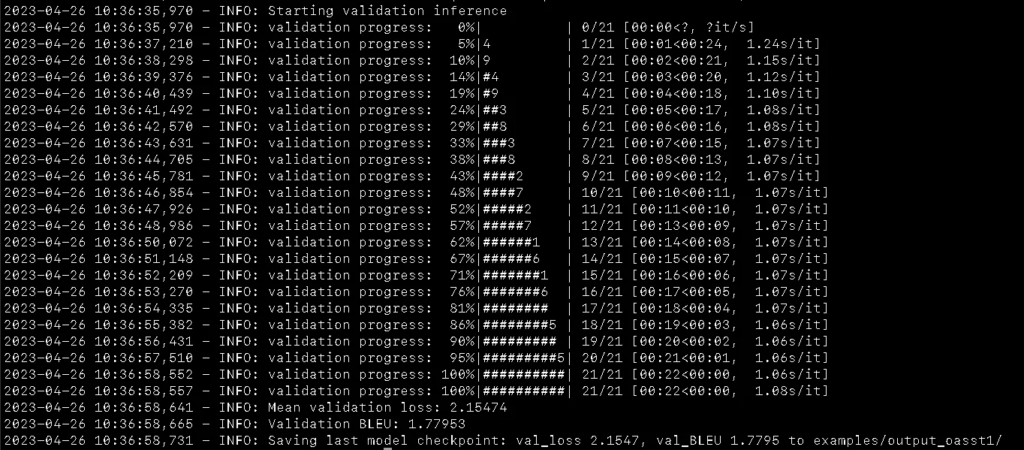

- Once the experiment finishes, you can chat with your model as follows:
python prompt.py -e examples/output_oasst1
This will allow you to test your model and see how well it performs.
Kaggle and Colab Integration
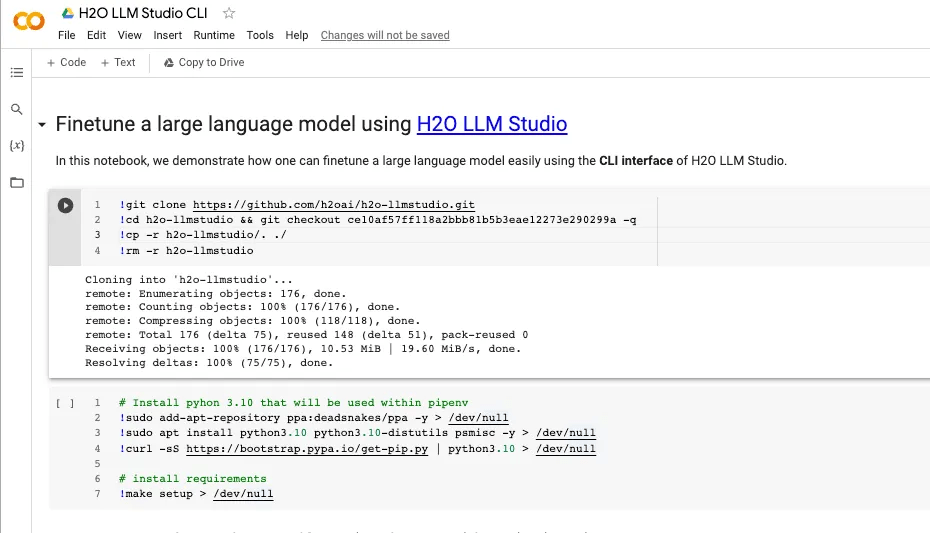
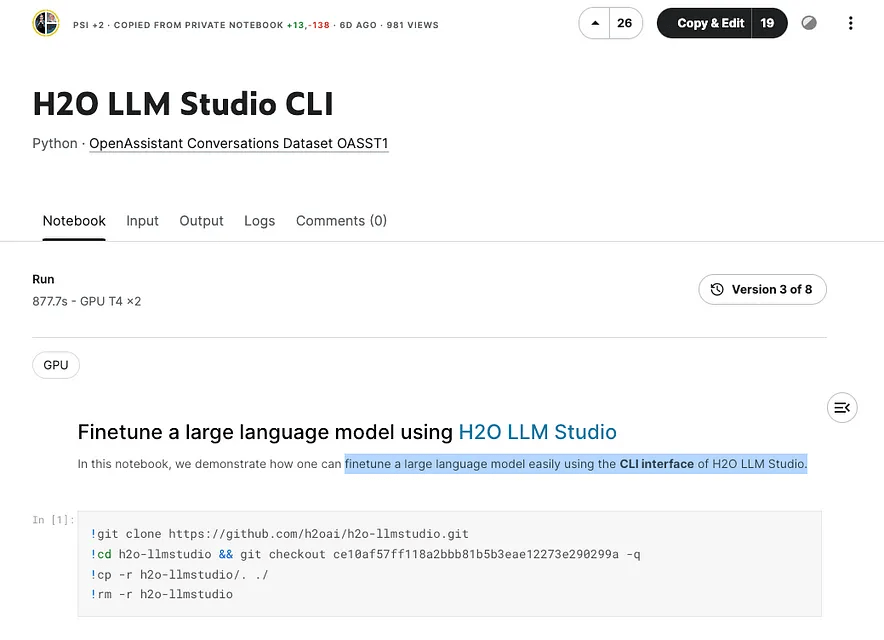
H2O LLM Studio is designed to work seamlessly with popular platforms like Kaggle and Colab, making it easy to get started quickly. The screenshots below show how you can fine-tune an LLM using the CLI interface of H2O LLM Studio both in Kaggle as well as in Colab Notebooks.


Conclusion
H2O LLM Studio revolutionizes the process of fine-tuning large language models by making them more accessible to a wider audience. Through its no-code graphical user interface, support for various hyperparameters, advanced evaluation metrics, model comparison, instantaneous feedback, and model-sharing capabilities, this tool provides NLP practitioners with a powerful means to customize language models to suit their particular tasks and domains quickly and effectively. With H2O LLM Studio, state-of-the-art language models are within reach of more people, empowering them to take advantage of the latest advances in NLP in their applications.
Additional Resources
- h2oGPT — The world’s best open-source GPT
- Live hosted instances:
h2oGPT 20B
h2oGPT 12B #1
h2oGPT 12B #2
- Join our Discord Server


