


How to use R, H2O, and Domino for a Kaggle competition

Guest post by Jo-Fai Chow
The sample project (code and data) described below is available on Domino.
If you’re in a hurry, feel free to skip to:
- Tutorial 1: Using Domino
- Tutorial 2: Using H2O to Predict Soil Properties
- Tutorial 3: Scaling up your analysis
Introduction
This blog post is the sequel to TTTAR1 a.k.a. An Introduction to H2O Deep Learning . If the previous blog post was a brief intro, this post is a proper machine learning case study based on a recent Kaggle competition : I am leveraging R , H2O and Domino to compete (and do pretty well) in a real-world data mining contest.

Accelerate Your Data Analysis with Domino
I think it is fair to say that Kaggle contests are very challenging. Even more so when you put the time constraint into the mix. Using Domino , let me easily scale up my analysis, take advantage of parallelized code and carry out many tests within a very short space of time. Competing in a data mining contest is all about understanding the problem better and identifying the best strategies sooner than your opponents. Having the ability to ask the data many questions at the same time is crucial.
As a result, Domino cut down days or even weeks of analysis to just a few hours. I could quickly evaluate many different machine learning strategies for the Kaggle contest. On top of that, I didn’t have to waste any time on infrastructure setup and hardware maintenance, so I could focus on understanding the machine learning problem better and improving the model performance steadily over time.
Go Deeper with H2O
To say that I am very impressed with the predictive performance of the H2O deep learning module is an understatement. All data geeks know about the “No Free Lunch” theorem . Yet, againist all odds and my past experience, I have managed to climb up the ladder using just the h2o.deeplearning algorithm and some simple model averaging strategies.
Performance is not the only thing, H2O’s highly efficient memory management and parallelized algorithms are just as amazing. It got even better when I realized that I can use R, H2O and Domino together. At that moment, I knew I had found a very promising machine learning solution and hence the motivation of this blog post.
About this Blog Post
This post is not only about Kaggle competitions, it is more about finding a practical and scalable data analysis solution . A generic and robust solution that I can rely on and apply to many of my machine learning problems in life (like this one ). My experience with this R + H2O + Domino combination in the last couple weeks has been very promising. So I would like to use this opportunity to share my experience. I hope this post encourages more data geeks out there to give R, H2O and Domino a try.
Using H2O alone is a huge topic. In order to keep things simple, I will just walk you through the starter code here. I promise you that there will be a more in-depth discussion on various machine learning algorithms and strategies after the contest. I also hope that these blog posts can eventually evolve into proper tutorials (as my tiny contribution to the data science communitiy).
Learning-by-Doing
I always believe that learning-by-doing is the best way to learn. So I have prepared two short tutorials with R starter code below to get you started with Domino and H2O. Hopefully, by going through the tutorials, you will be able to master the basics and to try H2O and Domino for your own data analysis very soon. Moreover, if you follow all the steps, you will get a CSV file that is ready for the Kaggle competition. Finally, when you are ready to up your game, check out the third tutorial about scaling up your analysis in just a few easy steps.
Wait … H2O, Domino, Kaggle? Who Are They?
Just in case you haven’t heard of them yet …
- H2O is an open-source math and in-memory prediction engine for big data science developed by 0xdata.
- Domino is a platform for analysts and data scientists that handles all the “plumbing” required to run, scale, share, and deploy analytical models.
- Kaggle is a platform for predictive modeling and analytics competitions and consulting.
Ready?
OK, that’s quite enough for an intro. Let’s dive into it!!!
Tutorial One: Using Domino
In the first tutorial, I will only focus on the basic Domino operations via their web UI and R interface. Although the R script is all about H2O machine learning, it is hard to learn two new things at the same time. So I will keep this simple and leave the H2O discussion for the next tutorial.
Step 1.1 – Get Up and Running
If you haven’t done so, sign up for a free account on the site, download and install the client . If you aren’t sure how to do this, you can follow their quick-start guide or the step-by-step tour .
Step 1.2 – Install R Interface
Domino has its own R package on CRAN. After installing the package, you can log into your Domino account and manage your projects directly from R. The Domino team has done a great job streamlining the whole process. Personally, I think this is yet another excellent example of using R as an interface.
install.packages("domino")
library(domino)
domino.login("your_username", "your_password")
Step 1.3 – Download Data and Code
This tutorial is based on the Kaggle Africa Soil Property Prediction Challenge . In order to carry out the data analysis, you will need to download the original datasets from Kaggle first. Then you can run a simple analysis using my sample R script, Kaggle_AfSIS_with_H2O.R .

Step 1.4 – Upload Data and Code
You will need to upload the files to a specific project folder on Domino. To keep things simple, I will use the quick-start folder here because most of you should have this folder somewhere on your local drive after going through Domino’s quick start guide .
On your machine, copy the Kaggle datasets and R script to the quick-start folder. The file structure should look like this:
| Before | After | |
|---|---|---|
| results / main.m main.py main.r | data / train.zip (note: create a new ‘data’ folder) data / test.zip data / sample_submission.csv results / Kaggle_AfSIS_with_H2O.R main.m main.py main.r |
Afer that, you can upload the files to your quick-start folder on Domino.
## Set Working Directory to the 'quick-start' folder
setwd("quick_start_dir_on_your_local_drive")
## Upload new files to the 'quick-start' folder on Domino cloud
domino.upload()
Step 1.5 – Check the Files
Before running the analysis, check and make sure the files are on the cloud. Log into your Domino account via the web UI and browse your files in your quick-start project.

Step 1.6 – Run your Code
Got all the files there? Great, you now are ready to run the analysis on the cloud!
Use the web UI to start a run (Runs -> Run -> Enter of the File Name -> Start Run).

domino.run("Kaggle_AfSIS_with_H2O.R")
Step 1.7 – Monitor Progress
Domino’s web UI lets you monitor your runs online. You can get access to all your files and project settings on the left panel. When you click on any of your runs, it will display the native console (R in this case) on the right with a summary below showing CPU load, memory usage and other information about the run.

Step 1.8 – Download the Results
The analysis takes about half an hour. After that, you can download the results my_Kaggle_submission.csv either from the web …

## Download the results to your local drive
domino.download()
By default, you will receive an email notification once the run has finished. There are more ways to [customize notifications]((http://help.dominoup.com/Notifications) if you are interested.

Step 1.9 – Submit it to Kaggle (Optional)
You can now go to the submission page and upload the CSV file. Good luck 
Try Your Own Code
I have shown you the basic steps to get my Kaggle starter code up and running on the Domino cloud. Now it is time to try your own code. Remember Domino also supports Python , Matlab and Julia !
Share Your Projects
It is very easy to share your Domino projects with others. You can enable public access to your project folder in the project settings so everyone can view your files and runs. For example, see my quick-start project here .

Version Control
As an aside: the version control on Domino is a well-thought process specially designed for data scientists. Instead of versioning individual files one at a time, Domino creates snapshots of your data, code and results altogether. That means it is very easy to go back in time and make reference to a particular run with the exact data and code used.
Tutorial Two: Using H2O to Predict Soil Properties
In this section, I will explain how I use R and H2O to train predictive models for the Kaggle competition. In short, we have to develop regression models based on 1158 rows of training data and then use the models to predict five soil properties Ca, P, pH, SOC and Sand for each of the 728 test records. For more information, please go to the description page on Kaggle.
Step 2.1 – Install R Interface for H2O
Again, R acts as an interface. Having R as the common interface,
H2O and Domino integrate seamlessly.
Like Domino, H2O also has an excellent R package. To begin with, you can install the CRAN Version of H2O:
install.packages("h2o")
If you want to take advantages of the new H2O features, you can install the bleeding edge version.
## Specify H2O version here
h2o_ver <- "1511"
## Install H2O
local({r <- getOption("repos"); r["CRAN"] <- "http://cran.us.r-
 project.org"; options(repos = r)})
txt_repo <- (c(paste0(paste0("http://s3.amazonaws.com/h2o-
 release/h2o/master/", h2o_ver),"/R"), getOption("repos")))
install.packages("h2o", repos = txt_repo, quiet = TRUE)
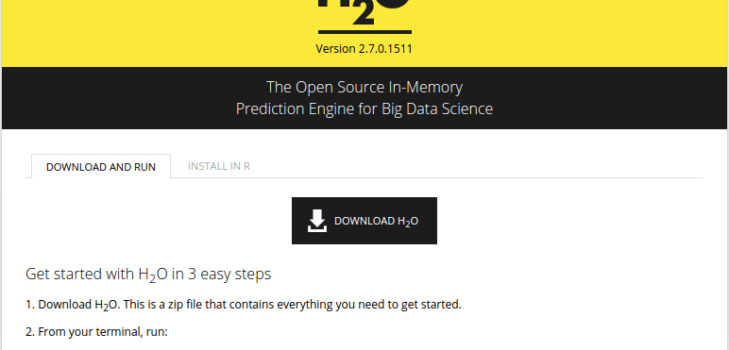
In order to find out the latest H2O version number, go to this page and look for the last four digits as shown in screenshot below.

## Use the wrapper function in my package 'deepr'
devtools::install_github("woobe/deepr")
deepr::install_h2o()
Step 2.2 – Initiate and Connect to a Local H2O Cluster
Using the argument max_mem_size in function h2o.init(...), we can manually limit the physical memory usage. In this tutorial, we set a limit of 1GB of memory as it is the maximum allowance of the Domino free tier.
library(h2o)
localH2O <- h2o.init(max_mem_size = '1g')

Step 2.3 – Import Data
Importing data is one of the things I like most about H2O!!! You can load compressed files (.zip, .gz) directly into the H2O cluster. This may not be significantly important for the small Kaggle dataset in this tutorial but it is certainly useful for bigger datasets.
## Import Data to H2O Cluster
train_hex <- h2o.importFile(localH2O, "./data/train.zip")
test_hex <- h2o.importFile(localH2O, "./data/test.zip")
Step 2.4 – Train Deep Neural Networks Models and Make Predictions
Without further ado, here is the starter code to train one deep neural networks model for each target variable and then use the models to make predictions. There are quite a few variables to tweak in the h2o.deeplearning(...) function. To keep things simple, I only provide the barebone code to get you started. For more information, I strongly recommend going through the vignette and demo code .
## Split the dataset into 80:20 for training and validation
train_hex_split <- h2o.splitFrame(train_hex, ratios = 0.8, shuffle = TRUE)
## One Variable at at Time
ls_label <- c("Ca", "P", "pH", "SOC", "Sand")
for (n_label in 1:5) {
 ## Display
 cat("\n\nNow training a DNN model for", ls_label[n_label], "...\n")
 ## Train a 50-node, three-hidden-layer Deep Neural Networks for 100 epochs
 model <- h2o.deeplearning(x = 2:3595,
 y = (3595 + n_label),
 data = train_hex_split[[1]],
 validation = train_hex_split[[2]],
 activation = "Rectifier",
 hidden = c(50, 50, 50),
 epochs = 100,
 classification = FALSE,
 balance_classes = FALSE)
 ## Print the Model Summary
 print(model)
 ## Use the model for prediction and store the results in submission template
 raw_sub[, (n_label + 1)] <- as.matrix(h2o.predict(model, test_hex))
}
Step 2.5 – Save Results as a CSV
The final step is to save all predictions as a CSV file. This is the CSV file in the correct Kaggle submission format.
write.csv(raw_sub, file = "./results/my_Kaggle_submission.csv", row.names = FALSE)
Try Other Datasets
That’s it! You have just trained some Deep Neural Networks models and used them for prediction! Why don’t you try the same thing on other datasets? For example, the Breast Cancer and MNIST datasets I used in the previous TTTAR blog post .
Try Other H2O Machine Learning Algorithms
The h2o.deeplearning algorithm is just one of the algorithms available in H2O. You can also try h2o.gbm, h2o.glm, h2o.naiveBayes, h2o.randomForest and more. All these functions can be called directly from R like the code example above. They have similar syntax so it should be very straight forward. For more information, the H2O tutorial is a great place to start with.
Tutorial Three: Scaling Up Your Analysis!
I have walked you through a simple H2O machine learning exercise for Kaggle on the Domino cloud. I hope the starter code and tutorials can help you better understand the R + H2O + Domino mechanism. However, the simplicity of the model means you will not be able to achieve a very good score on the Kaggle leaderboard.
When you are ready to gear up your effort (e.g. building more complex models) or analyse much bigger datasets, you can easily scale up your data analysis on Domino in a just few steps. Ready? Read on!
Choose a Higher Hardware Tier
You can find the hardware tier drop down list in the project settings. All you need to do is to choose a tier that suits your needs. Domino will sort out the rest for you.

Modify Your Code
If you use the R + H2O + Domino combination, you can easily improve H2O’s performance by increasing the physical memory allowance. H2O will automatically parallelize the machine learning algorithms and utilize all CPU cores. For general code parallelization, read this Domino blog post about easy parallel loops .
## Increase the H2O Cluster Memory Allowance (e.g. 25GB)
localH2O <- h2o.init(max_mem_size = '25g')
Use Multiple Instances
To further increase productivity, you can start multiple runs at the same time. Again, no complex set up is required. Just start your runs as usual. Domino will take care of the rest. In the screenshot below, you can see I would run multiple experiments simultaneously, each of which could take many hours and use 30GB of memory and 30 cores of CPU.

Conclusions
If I have to summarize this experience, I would say that the discovery of this R + H2O + Domino combination has been very exciting and promising! I can confidently say I have a practical and scalable solution to deal with not just Kaggle but many other machine learning problems. I also know this solution can get even better! I will continue to explore and experiment with other tools.
All the Links
This was quite a lengthy post so let me summarize all the useful resources here:
Domino
- Sign Up
- Documentation & FAQ
- Quick Start
- Step-by-Step Tour
- Blog
- Nick’s Post about Integrating R with Production Systems using an HTTP API
- Easy Parallel Loop
H2O
- Documentation
- Quick-Start Videos
- R Package
- R Tutorial
- Oxdata Presentations
- Deep Learning through Examples Screencast
- h2ostream Forum on Google
- H2O Deep Learning Vignette and Demo Code
It’s the people, not just the tools!
I have told you how great these tools are. But I haven’t mentioned the awesome people behind the scenes.
First of all, I would like to thank Nick Elprin for his tremendous support since the early days of Domino. Not only has Nick given me unlimited cloud resources in the last couple weeks to experiment with this R + H2O + Domino combination (it all began with a quick email “Hi Nick, can I use H2O on Domino?” ), he also continously helps me out with many technical issues and turns my requests into new features.
Then, of course, is the Oxdata team (Sri Ambati , Arno Candel , Viraj Parmar, Cliff Click, Kevin Normoyle, Raymond Peck , Spencer Aiello and many others) behind the H2O engine. Since the early days when I began taking my baby steps to understand H2O, they have been emailing me tips and information about H2O as well as encouraging me to push the boundaries. Especially Arno Candel who gave me some very specific advice on fine-tuning h2o.deeplearning and other functions.
I hope you find this post useful. If you decide to give this R + H2O + Domino combination a try but have questions regarding the set up, feel free to email / tweet me as well as the Domino and Oxdata team. I know your questions and feedback will help them evolve and shape even better products for data science. Unfortunately, I need to follow Kaggle competition rules and I can’t tell you exactly what I do to climb up the leaderboard. Yet, you can pretty much guess it from the name of my blog “Blend It Like a Bayesian! “.
I afraid I can’t cover everything in one post but I will continue to blog about other cool Domino and H2O features in the coming months.
Till next time.
Joe