


SJSU Tutorial on H2O and Random Forest

Our friends over at SJSU added this post to their course website after the H2O team stopped by earlier this semester to talk about H2O. We’ve reposted it here, but you can find the original at:
http://sjsubigdata.wordpress.com/2014/04/24/oxdata-h2o-tutorial/
Oxdata (H2O) Tutorial
Posted on April 24, 2014 by bigsjsu
Oxdata (H2O) Tutorial
In current times, there are tons of information generated in social media for every day. This data is very huge to process by traditional methods. And thus, it’s big challenge to store the data and process it in a meaningful way to extract the needed information from the available data. There are various tools and libraries that help analysts achieve these data mining tasks. H2O is one such open source, in-memory prediction engine for Big Data Science . In this tutorial, I’ll focus on installing H2O, setting up H2O and training a particular model in H2O.
Below are the contents of this tutorial:
- 1.Introduction of H2O
- H2O Architecture
- Installation of H2O
- Integration of H2O with Hadoop
- Integration of H2O with R
- Integration of H2O with EC2
- Walk through of a model in H2O, What is Random Forest Model, Dataset description, Loading of data in H2O, Building Random Forest in H2O,Results of Random Forest Model
1. INTRODUCTION OF H2O
H2O is an open source machine learning platform. It is easy to install on any machine and has a good user interface. It can work with HDFS on Hadoop environment. Thus, when working on HDFS, H2O makes Hadoop do math and analysis. It can be considered as a math engine that brings interactivity and scalability to big data modeling. H2O allows large data set to be used in real time with out the need of sampling. It is a better prediction analytical engine in Big data science. H2O supports distributed algorithms like Classification , Clustering and Regression . It includes wide range of models like K Means, Logistic Regression , Generalized Linear Model, Random Forest and Gradient Boosting Machine.
WHAT DOES H2O DO?
Adhoc exploration of big data
- Slice big data to test and train, verify assumptions in data.
- R and Python-like syntax for the Data Manipulation Console.
Modeling engine with high-powered math algorithms
- Classification Random Forest
- Regressions GLM/GLMnet Parallel grid search on the parameter space of the regression method
- Clustering K-Means
Real-time scoring
- Ensembles
- 100’s of Models
- 100′s of Nanoseconds
- Embeddable online and offline scoring
2. H2O ARCHITECTURE
H2O does in-memory analytics on clusters with distributed parallelized state-of-the-art Machine Learning algorithms . It operates at layer level and is coded to at different layers to approach different tasks and problems.
In-memory distributed K/V store layer : It is similar to the Java memory Model but this is also distributed. Both read and write are fully cacheable. All reads and writes go through a non-blocking hash table. H2O keeps all data in heap. The advantages of keeping all data in heap is that it is as fast as possible and is easy to code (pure Java). When Java heap gets too full, H2O does user-mode swap-to-disk.
Pre-baked Algorithms layer : Variety of fully optimized and fully featured algorithms in H2O. Within each algorithm, H2O supports full range of tuning parameters and options.
3. INSTALLATION OF H2O
H2O is a tool written and developed in Java. It is simple to install and is possible to set up even in your laptops.
Pre-requirements to install H 2 O :
H2O is OS independent, however, you need Java installed in your machine. Check to see if Java is installed in your laptop by issuing the following command from your terminal.
$ java -version
Procedure to install H 2 O :
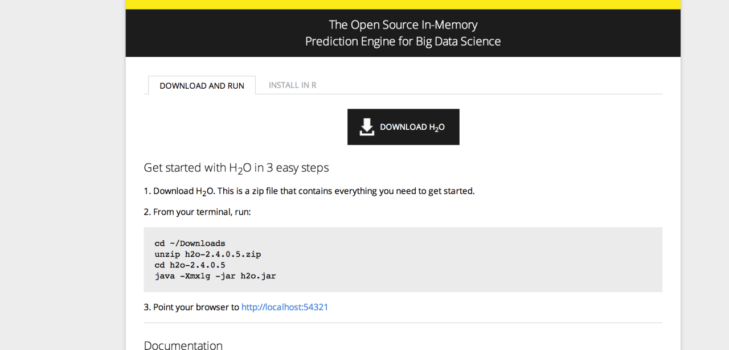
Step1: Download the latest H2O installable zip file fromhttp://0xdata.com/downloadtable/
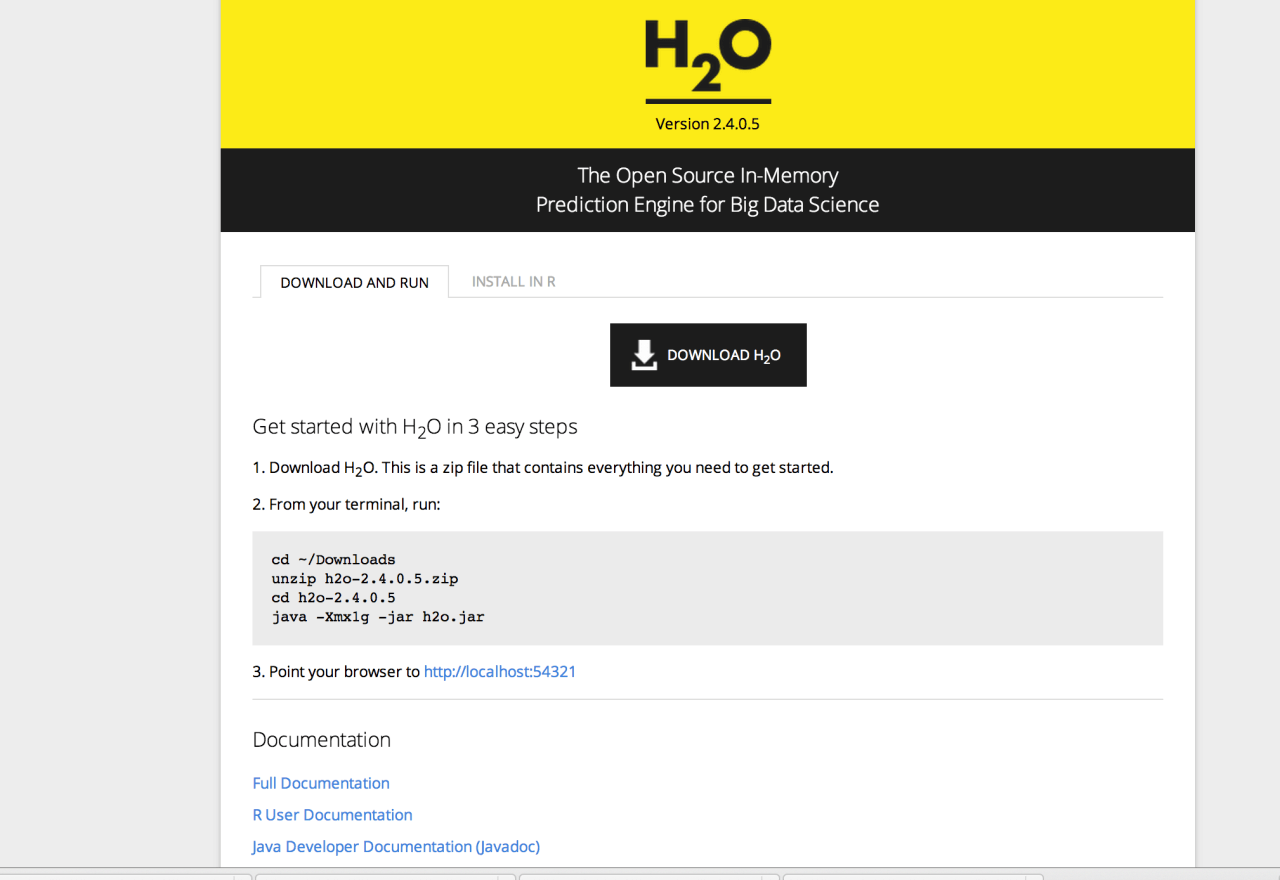
Step2: Unzip the file and point your terminal to the directory where you have unzipped the H2O installable.
$ cd h2o-1.7.0.520
$ java -Xmx1g -jar h2o.jar
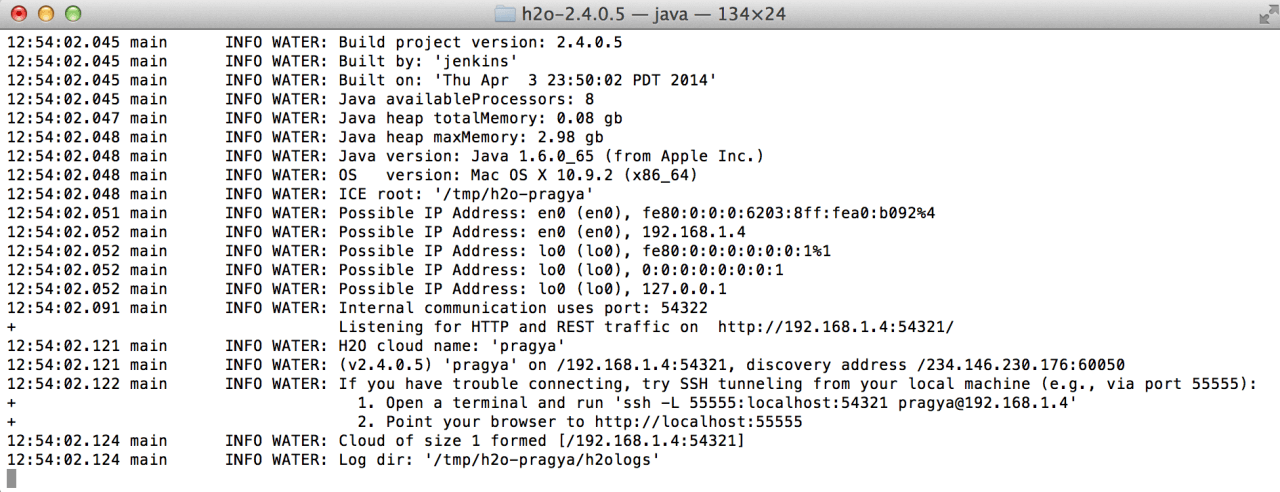
The following screen shows the installation is complete
Step3: Open the URL: http://localhost:54321/

4. INTEGRATION OF H2O
H2O’s integration with Hadoop makes it possible to use files stored in Hadoop HDFS. When the data is in Hadoop cluster, use Hadoop to monitor and launch H2O tasks.
System Requirements for H2O on Hadoop:
H 2 O node software requirements : 64-bit Java 1.6 or higher H 2 O node hardware requirements : HDFS disk (for spilling) Supported Hadoop software distributions : Cloudera CDH3.x, CDH4.x, MapReduce v1 is tested, YARN support is in development, MapR 2.x, Hortonworks HDP 1.3, HDP 2.0, HDP Sandbox
Steps to install H 2 O on Hadoop : Step1: Like any other file, copy H2O installable into Hadoop machine.
Step2: Prepare job input on Hadoop node $ cd h2o-* $ cd hadoop
Step3: Run job $ hadoop jar h2odriver_cdh4.jar water.hadoop.h2odriver [-jt<jobtracker:port>] -libjars ../h2o.jar -mapperXmx 1g -nodes 1 -output hdfsOutputDirName
Step4: Monitor job: use the web UI http://<jobtrackerip>:50030
How H 2 O works on Hadoop : H2O nodes are launched via Hadoop MapReduce and runs on Hadoop DataNodes. At a system level, an H2O node is a Java invocation of h2o.jar.
Hadoop operations are centralized around HDFS file accesses and H2O operations are memory-based when possible for best performance. H2O reads the dataset from HDFS into memory and then attempts to perform all operations to the data in memory. A H2O cluster is a group of H2O nodes that operate together to work on jobs. H2O scales by distributing work over many H2O nodes. Multiple H2O nodes can run on a single Hadoop node if sufficient resources are available. All H2O nodes in an H2O cluster are peers. There is no “master” node.
An H2O node may choose to temporarily ‘spill’ data from memory onto disk. In Hadoop environments, H2O spills to HDFS. Usage is intended to function like a temporary cache and the spilled data is discarded when the job is done.
H2O implements a distributed in-memory Key/Value store within the H2O cluster. H2O uses Keys to uniquely identify data sets that have been read in (pre-parse), data sets that have been parsed (into HEX format), and models (e.g. GLM, Random Forest) that have been created. For example, when you ingest your data from HDFS into H2O, that entire data set is referred to by a single Key.
5. INTEGRATION OF H2O WITH R
H2O is interfaced with R so that big data enthusiasts and experts can explore different models and score data sets using a range of simple to advanced algorithms.
System Requirements for H2O on R : Assumes that you have installed R 2.14.0 or later
Steps to install H 2 O on R : $ if (“package:h2o” %in% search()) { detach(“package:h2o”, unload=TRUE) } $ if (“h2o” %in% rownames(installed.packages())) { remove.packages(“h2o”) }


Step2: Then download, install and initialize the H2O package for R using following commands:
$ install.packages(“h2o”, repos=(c(“<a href="http://s3.amazonaws.com/h2o-release/h2o/rel-kahan/5/R”" rel="nofollow">http://s3.amazonaws.com/h2o-release/h2o/rel-kahan/5/R”</a>;, getOption(“repos”))))
$ library(h2o)
$ localH2O = h2o.init()
Step3: Then try a GLM demo on R by invoking $ demo(h2o.glm)
Results from R Console

6. INTEGRATION OF H2O WITH EC2
H2O’s integration with EC2 makes it easy to be integrated with all other Amazon AWS services. However, this is still in adding and testing.
System Requirements for H2O on EC2 : You must install the boto python library.
Steps to install H 2 O on EC2 :
Step 1: Build a cluster of EC2 instances
Step 2:  Start H2O, one H2O node per EC2 instance $ ./h2o-cluster-start-h2o.sh
Step 3:  Point your browser to H2O. Point your web browser to <a href="http://<any" rel="nofollow">http://<any</a> one of the public DNS node addresses>:54321 Stopping and restarting H2O : $ ./h2o-cluster-stop-h2o.sh  $ ./h2o-cluster-start-h2o.sh
7. WALK THROUGH OF A MODEL IN H2O
In this section, I will explain you about the Random Forest Model and its typical use case in H2O.
What is Random Forest?
A random forest is an ensemble of decision trees that will output a prediction value. An ensemble model combines the results from different models. A Random Forest is combination of classification and regression. The result from an ensemble model is usually better than the result from one of the individual models. In Random Forest, each decision tree is constructed by using a random subset of the training data that has predictors with known response. After you have trained your forest, you can then pass each test row through it, in order to output a prediction. The goal is to predict the response when it’s unknown. The response can be categorical(classification) or continuous (regression). In a decision tree, an input is entered at the top and as it traverses down the tree the data gets bucketed into smaller and smaller sets. The random forest takes the notion of decision trees to the next level by combining trees. Thus, in ensemble terms, the trees are weak learners and the random forest is a strong learner.
Pros and Cons of choosing Random Forest?
Random forest combines trees and hence incorporates most of the advantages of trees like handling missing values in variable, suiting for both classification and regression, handling highly non-linear interactions and classification boundaries. In addition, Random Forest gives built-in estimates of accuracy, gives automatic variable selection. variable importance, handles wide data – data with more predictors than observations and works well off the shelf – needs no tuning, can get results very quickly. The runtimes are quite fast, and they are able to deal with unbalanced and missing data.
Random Forest weaknesses are that when used for regression they cannot predict beyond the range in the training data, and that they may over-fit data sets that are particularly noisy. However, the best test of any algorithm is determined by how well it works upon a particular data set.
Dataset Description
I’m using an internet ads dataset that is publicly available in the following URL:http://archive.ics.uci.edu/ml/machine-learning-databases/internet_ads/
The dataset has 3279 observations, 1557 attributes. The main objective of this tutorial is built a Random Forest prediction that predicts if an object is an ad or not.
Loading of data in H2O
The random forest algorithm uses a training dataset to build a model. Under the drop down menu Data select Upload and use the helper to upload data.
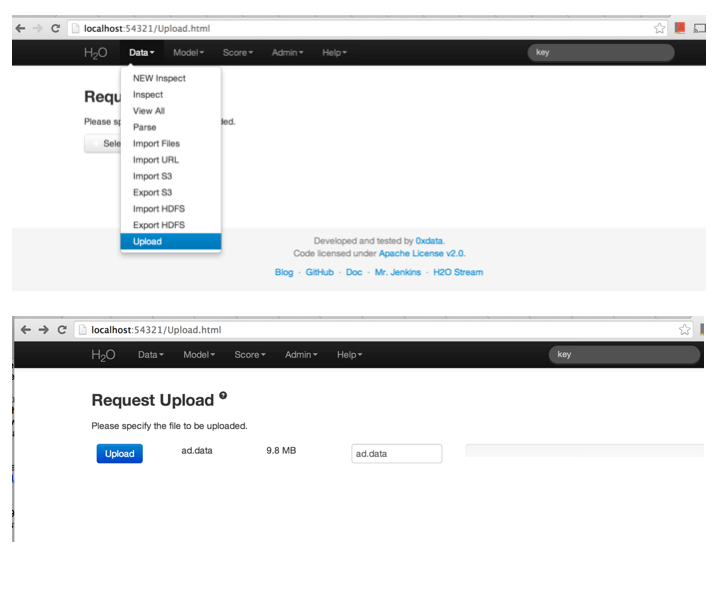
After uploading page is redirected to a page with the header “Request Parse”. Select whether the first row of the data set is a header as appropriate. All settings can be left in default. Press Submit. To parse the uploaded dataset use Parse option from Data menu.
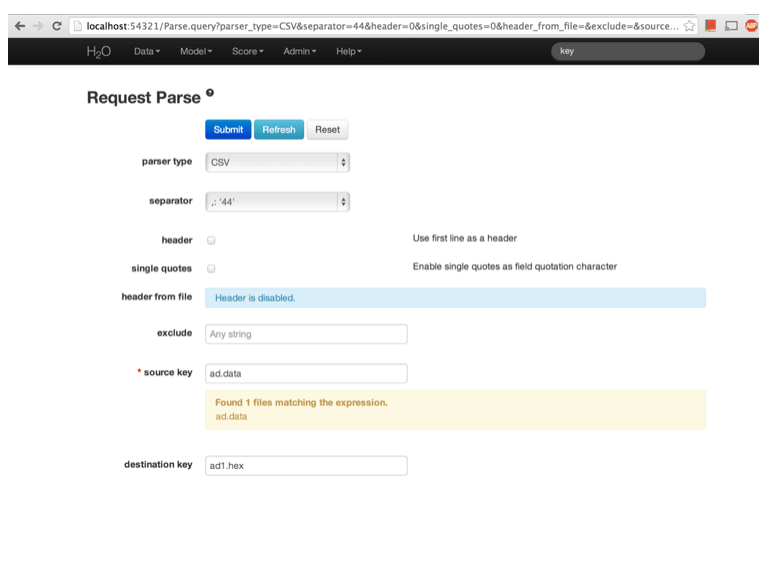
Parsing data into H2O generates a .hex key (“data name.hex”). The parsed data can be inspected by choosing Inspect from Data menu.
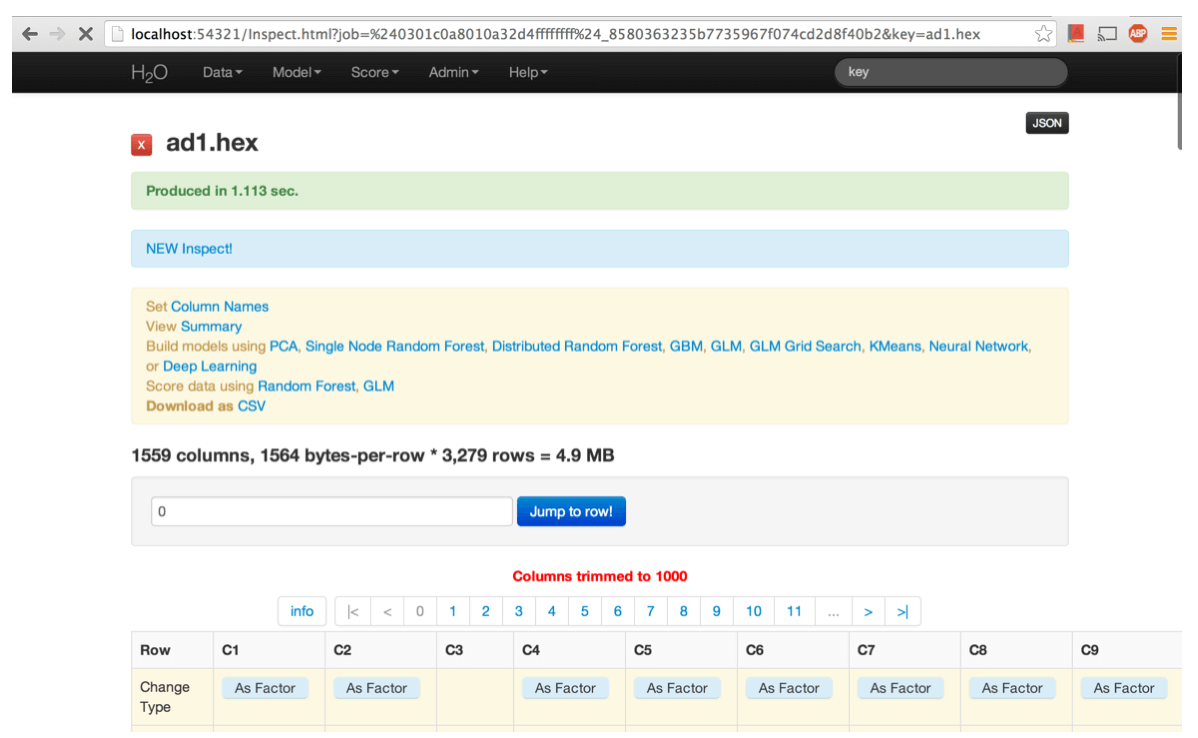
The inspect view shows the columns and rows for the dataset. For each column it displays its type, parity, basic statistical information (min/max/min/variance), and number of missing or invalid rows. The whole dataset can be explored row by row if desired.
Building of Random Forest in H2O
Now that we have loaded the dataset into H2O, we can build a random forest model. The random forest algorithm has multiple tuning parameters that can affect the model it will build. For example, you can increase the number of trees, alter which column from the dataset the model is predicting, or change the split criterion for generating trees from Gini to Entropy.
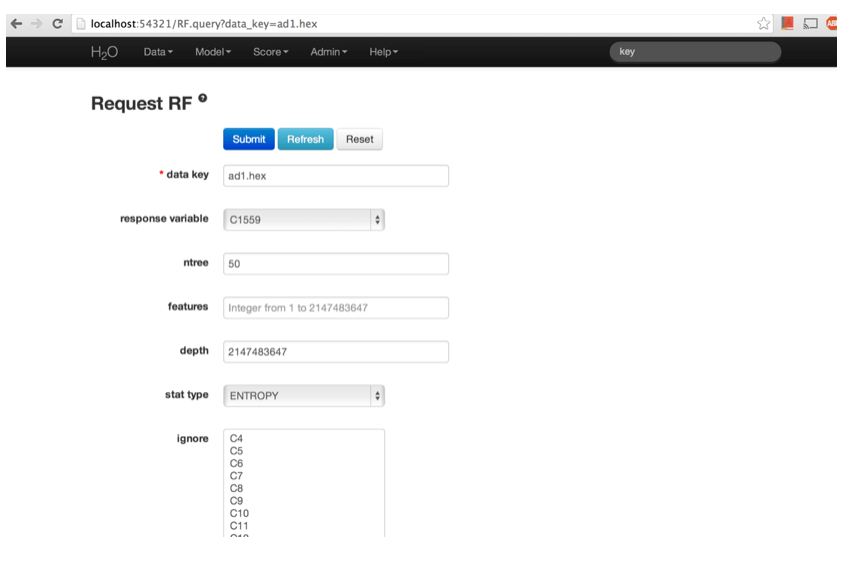
Step1: Once the data is parsed a horizontal menu will appear at the top of the screen reading “Build model using … ”. Select Random Forest here, or go to the drop down menu “Model” and find Random Forest there.
Step2: In the field for Data Key enter the .hex key generated when data were parsed.
Step3: In Ntree specify the number of trees to be built; in this case 150.
Step4: Features specifies the number of features on which the trees will split. For this analysis specify Features to be 1000.
Step5: Depth specifies the maximum distance from root to terminal node. Leave this in default.
Step6: Stat type provides a choice between split criteria. Entropy maximizes information gain, where Gini seeks to isolate the dominant category at each node. Choose Gini for this analysis.
Step7: Ignore provides a list of attributes. Selecting an attribute will exclude it from consideration in tree building.
Step8: Class weights and sampling strategy are both used to correct for unbalanced data. Leave both in default here.
Step9: Sample specifies the proportion of observations sampled when building any given tree. The observations omitted from building a tree are run down the tree, and the classification error rate of that tree is estimated using the error rate from this holdout set.
Step 10: Exclusive split limit defines the minimum number of objects to be grouped together in any terminal node.
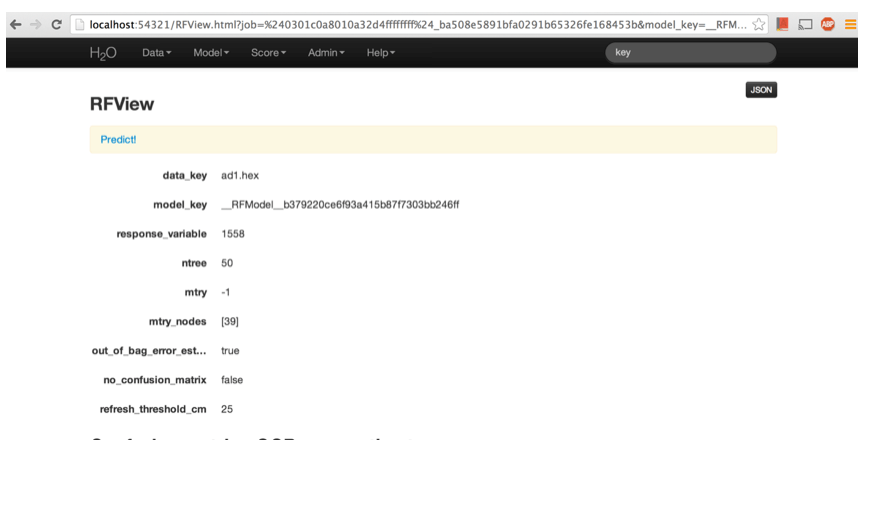
Results of Random Forest Model
The Random Forest results mainly outputs a confusion matrix detailing the classification error rates for each level in the range of the target variable. In addition to the confusion matrix, the overall classification error, the number of trees and data use descriptives are included.

It is clear that we have used 50 trees and that the classification error is approximately 3%. The total observations were 3279. Of these observations, 541 were skipped. Hence, a total of 2738 rows were taken for modeling.
The error rate in each class is defined as the proportion of misclassified observations in just that class. However, the overall misclassification rate is the proportion of misclassified observations for the entire data set.
The error rate for each class will not always exactly match the overall error rate. You will most likely have some classes that are going to be harder to identify than others, and then the overall error rate is sort of the “average”.
References
Cutler, Adele. “An Introduction to Random Forests By Dr. Adele Cutler.” An Introduction to Random Forests By Dr. Adele Cutler. Heather Hinman, 24 Jan. 2013. Web. 10 Apr. 2014.